Cookies help us deliver our services. By using our services, you agree to our use of cookies. Learn more
Documents and Invoices
Create a new document
NOTE: Before creating a document you need to have entered the bills you want to use into your Bills list (see Bills instructions).
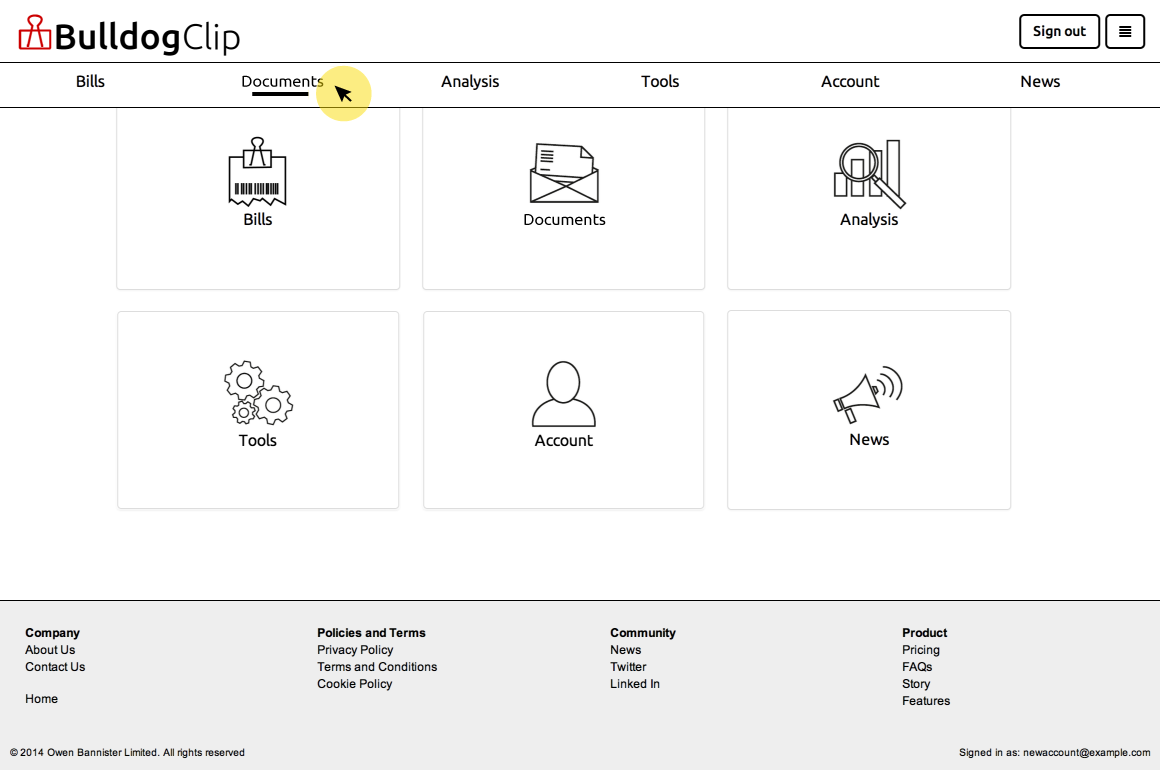
Select 'Documents' from the main menu.
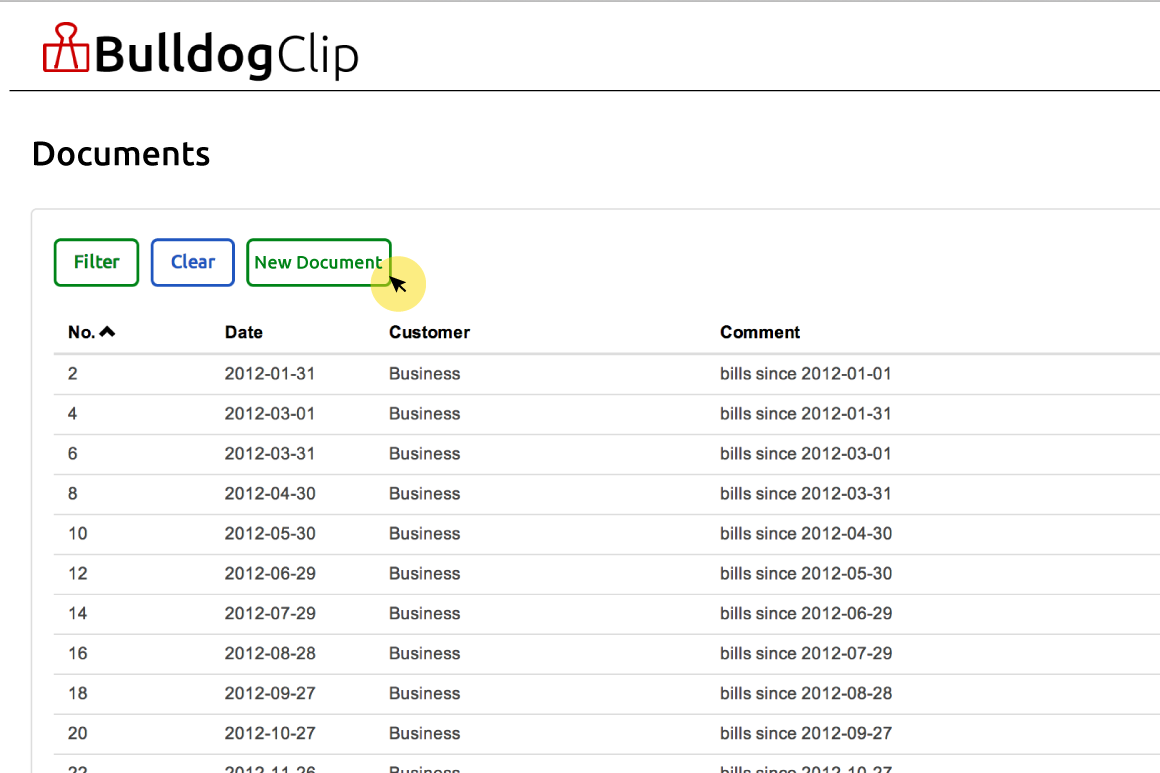
This will bring you to a list of all your existing documents. Select the 'New D' button at the top of the list.
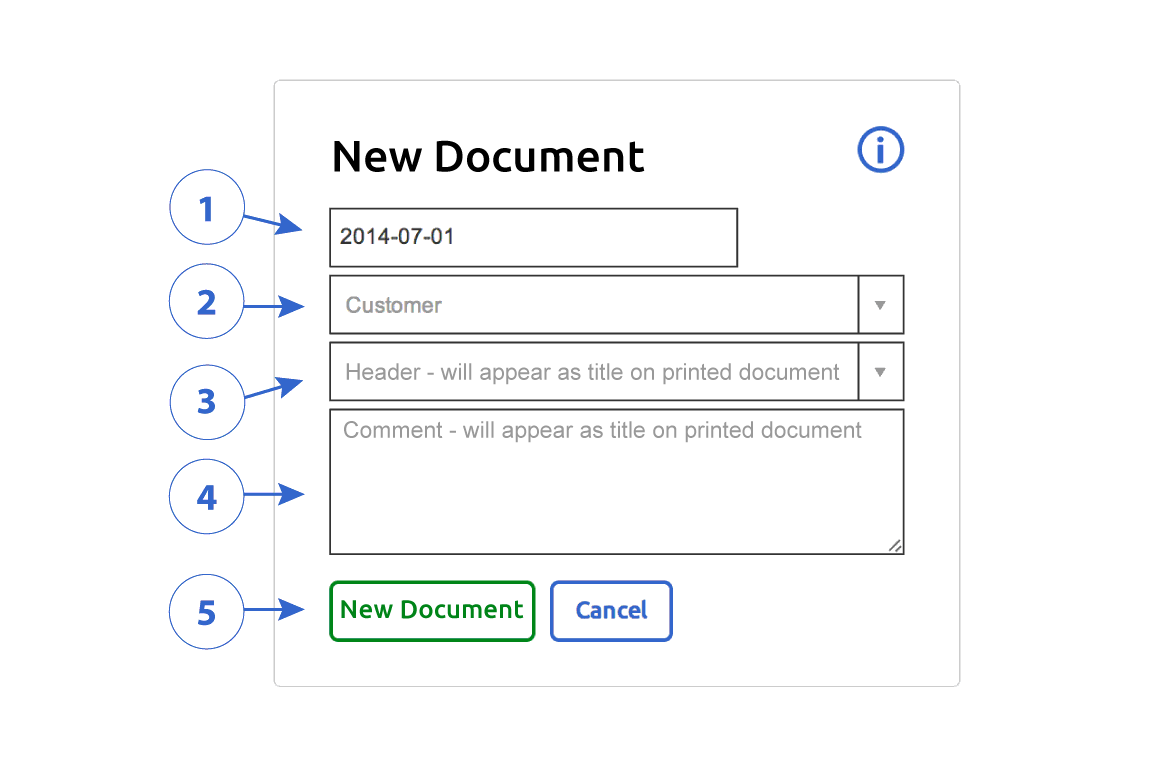
Complete the form.
Enter the date you want to appear on the document. For an invoice this will be the Invoice Date. You can use the dropdown date picker provided or type it in using the format shown.
Customer - Select the customer that you are creating the document for. This will add to the document all bills in the Bills list for that customer. You can remove any unwanted ones later.
Header - A header should be short (one or two words) and describe the purpose of the document, this might be Invoice or Expense Claim. You can enter whatever suits your need. It will appear as a title beneath the address on your document. BulldogClip will remember it and next time you create a document it will be available in the dropdown menu.
Comments are optional and can be used to give a more detailed description of the purpose of the document or notes to a customer. For example you might write 'Building materials purchased for kitchen extension.' or 'Payment required by...'. The comment will appear just above the list of bills.
Once you have completed the form select 'Create Document' or choose 'Cancel' if you change your mind.
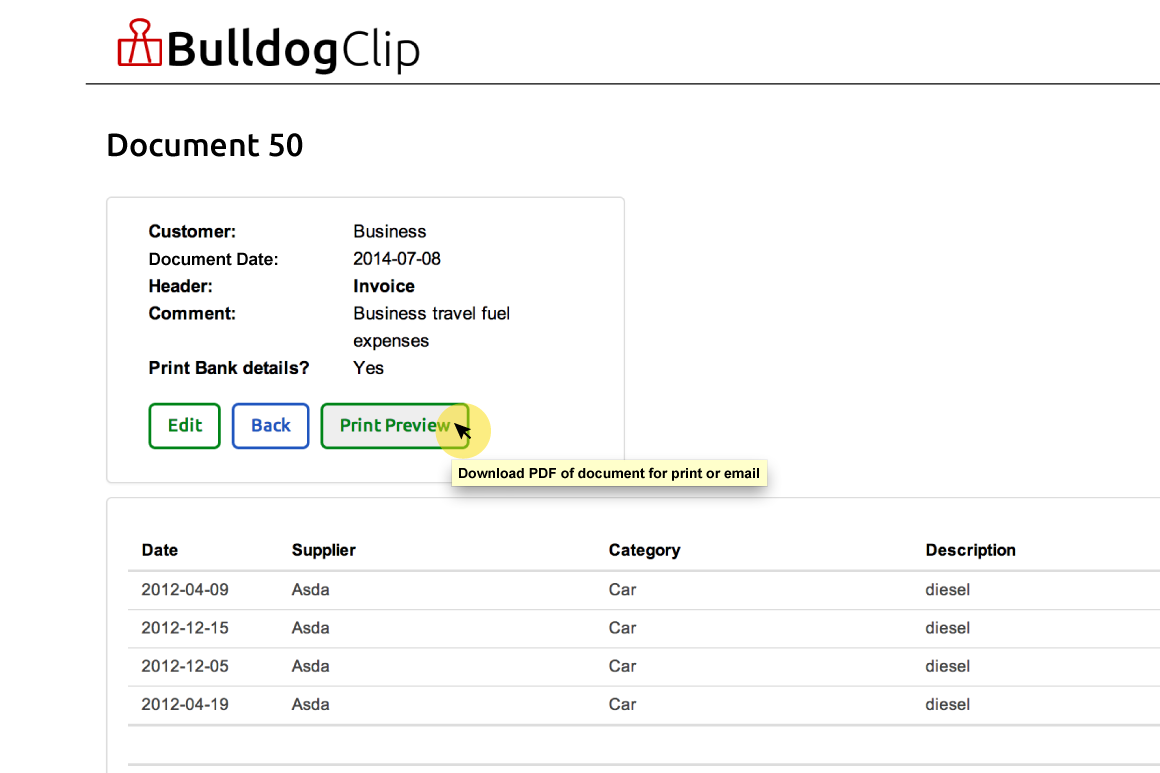
You can now preview what will be included in your document and make any changes you want.
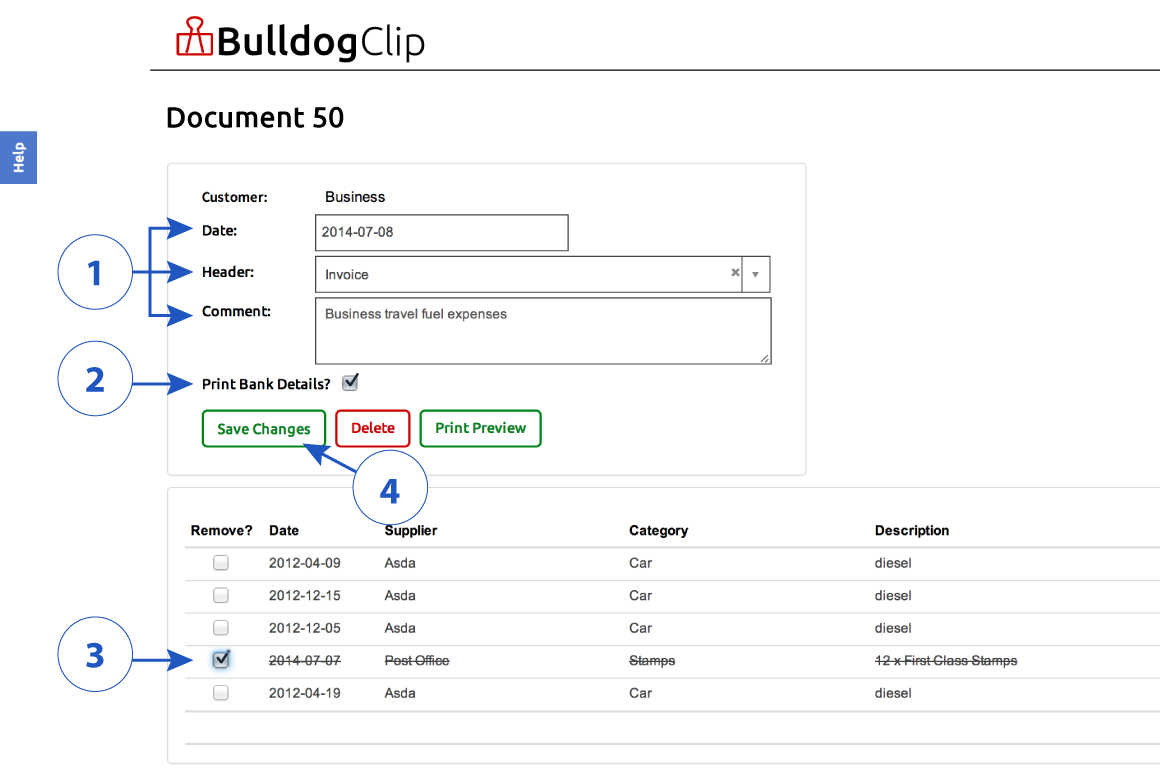
You can change the date, header and comment in the form at the top of the page.
If you want to include your bank details ensure that you have checked the box for 'Print Bank Details'.
The list will show all the bills currently in your Bills list for the customer you have selected. If you do not want to include them all you can tick the remove boxes next to any bills that you want to remove from the document.
Once you have made all the changes you want select 'Save Changes' to update the document.
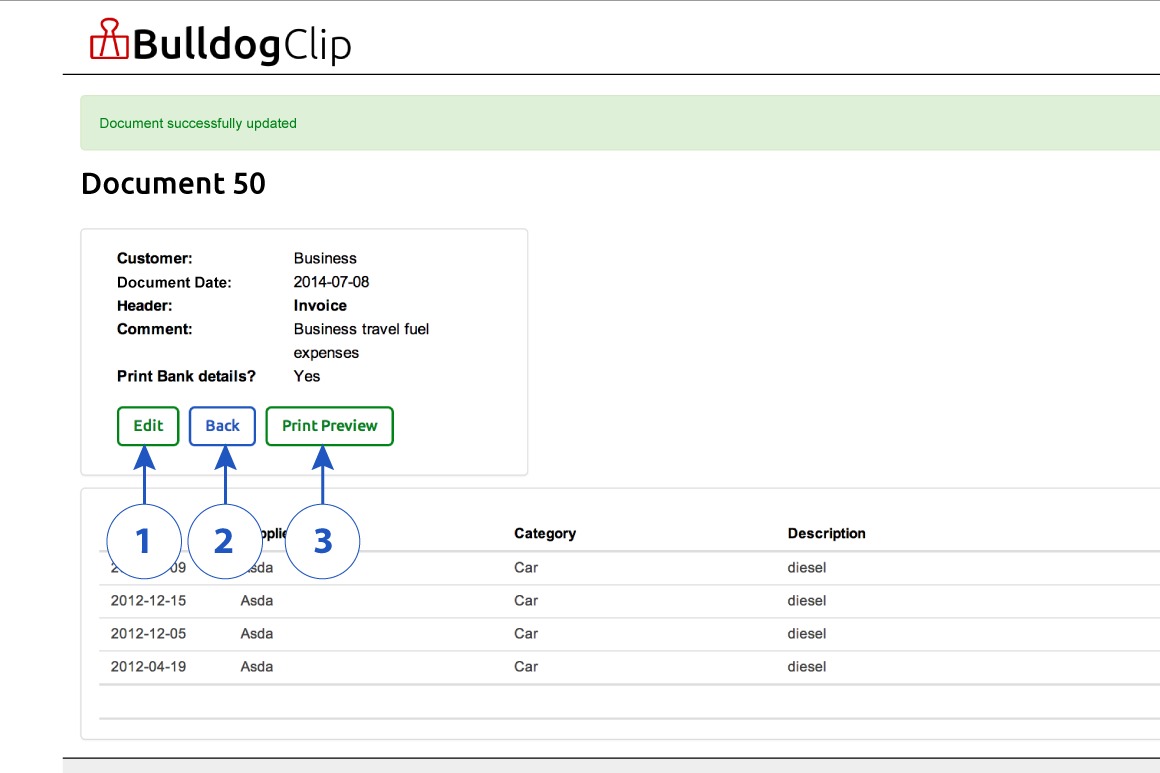
You should see a green message at the top of the page saying 'Document successfully updated' and an updated view of the contents to be included in your document.
To make any further changes select 'Edit'.
If you are happy with your document but do not want to print it at the moment select 'Back' to save the document and return to your Documents list.
To view your document as a PDF (to print, email, or save a copy to your computer) select 'Print Preview'.
Find an existing document
The Documents feature has a filter function to help you find an existing document in your list.
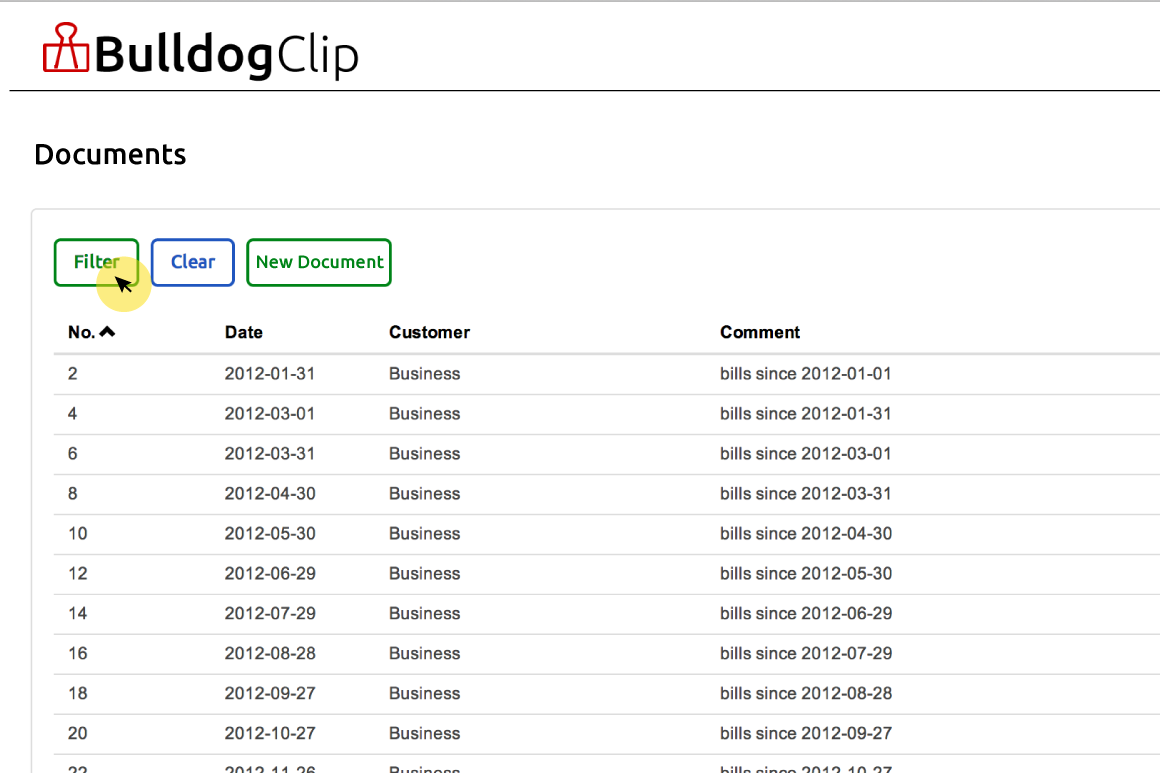
Select 'Documents' from the main menu.
This will bring you to a list of all your existing documents. Select the 'Filter' button at the top of the list.
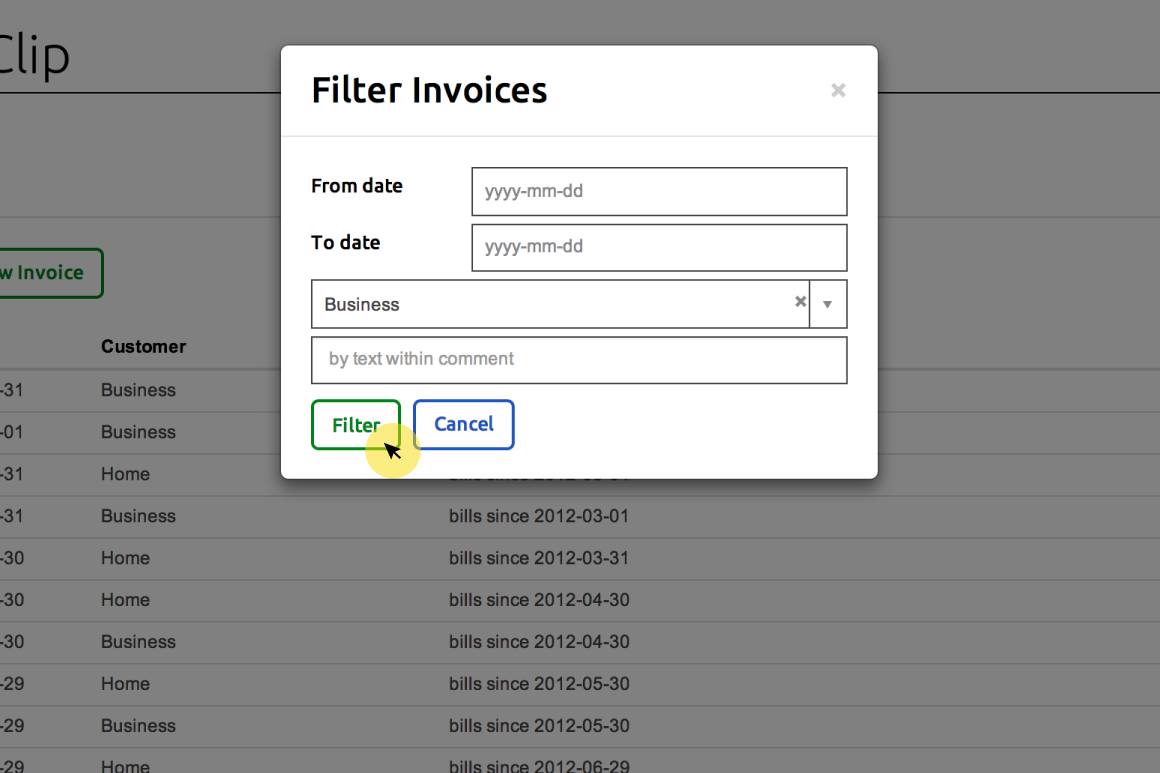
You can filter by one or more of the options provided.
Select 'Filter' to submit your search or 'Cancel' to return to the Document list.
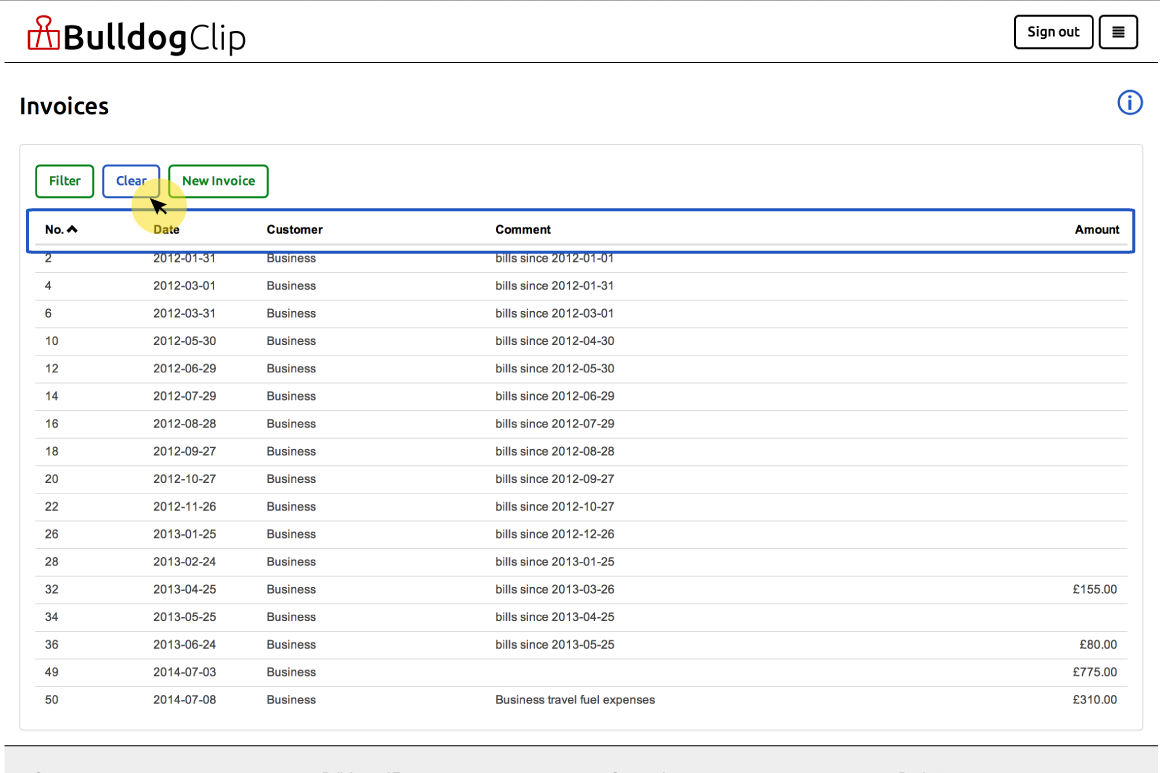
Once you have applied a filter the Document list will show only the documents that match the criteria you set. To return to seeing all of your documents select the 'Clear' button above the list.
You can further sort your documents by selecting any of the column headings. This will sort the column by alphabetical or numerical order.
Edit an existing document
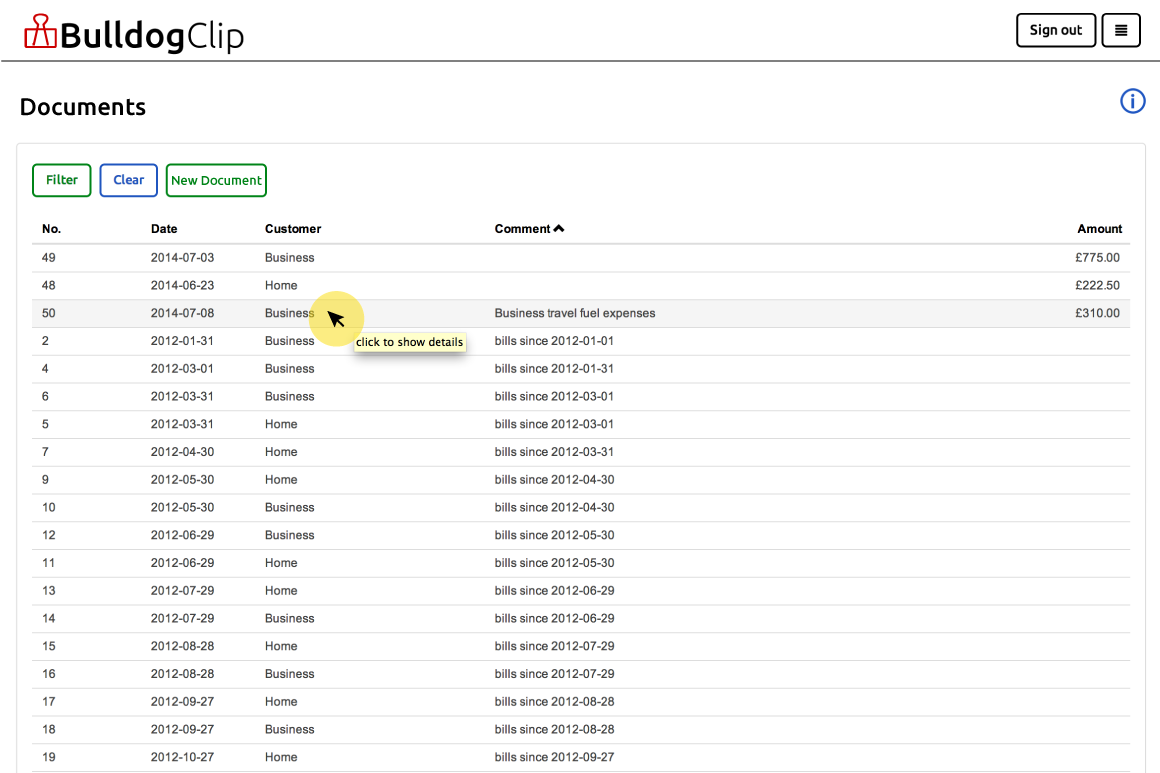
Select 'Documents' from the main menu.
This will bring you to a list of all your existing documents.
Find the document you want to edit in the list and select the row by clicking or tapping. You may want to use the Filter feature if you have a lot of documents (see Find An Existing Document).
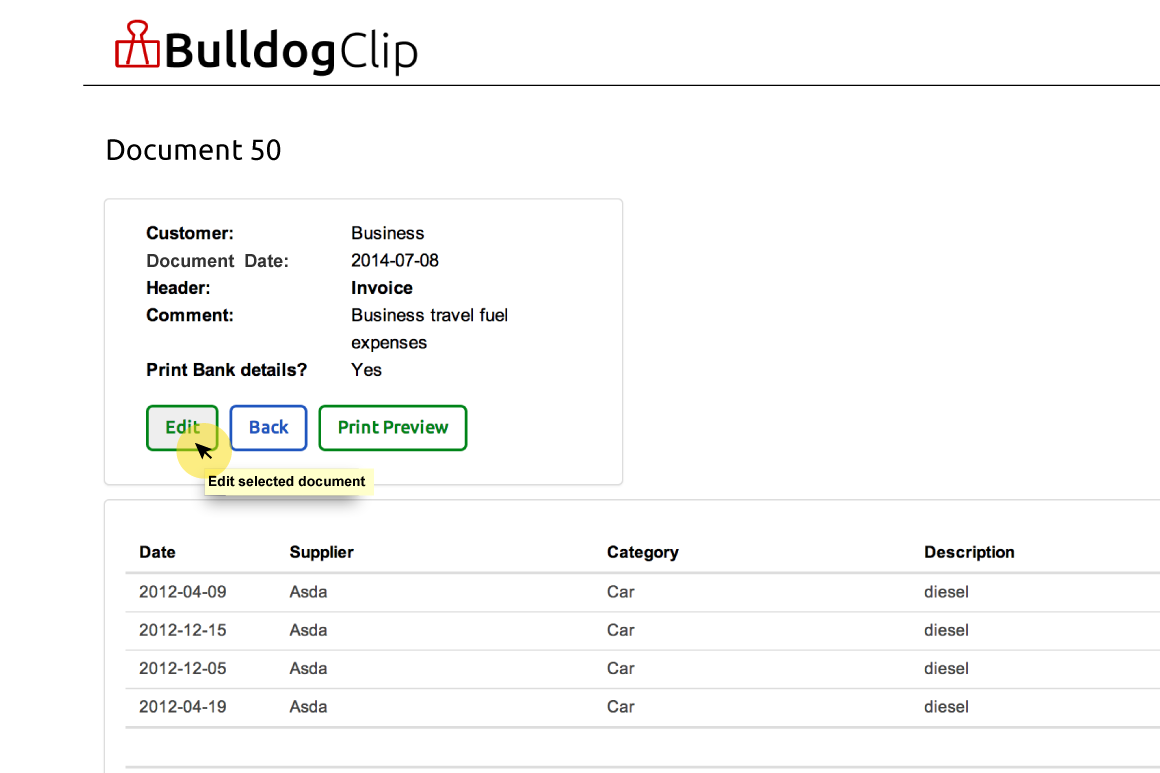
This will open up the document so you can see its current setup. If you want to make any changes select the 'Edit' button.
On this page you can make changes to your document or delete it completely.
To make changes:
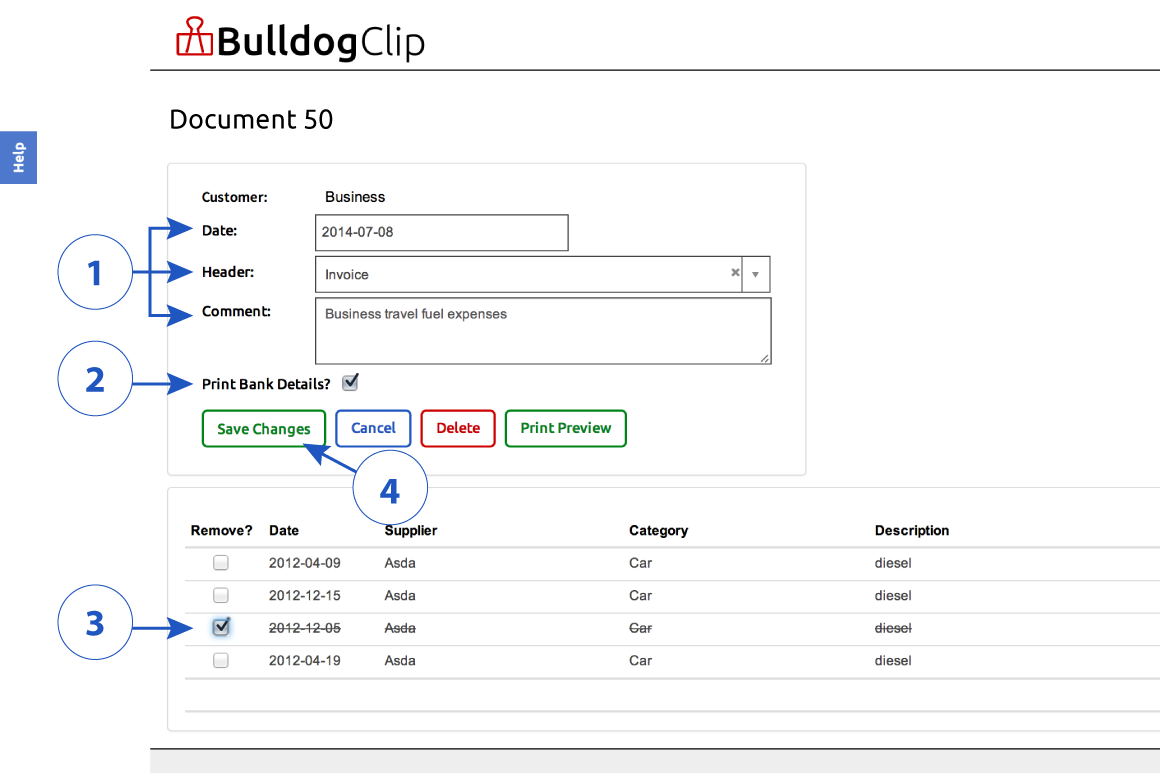
Edit the date, header or comment in the form at the top of the page.
If you want to include your bank details ensure that you have checked the box for 'Print Bank Details'.
Tick the remove boxes next to any bills that you want to remove from the document.
Once you have made all the changes you want select 'Save Changes' to update the document.
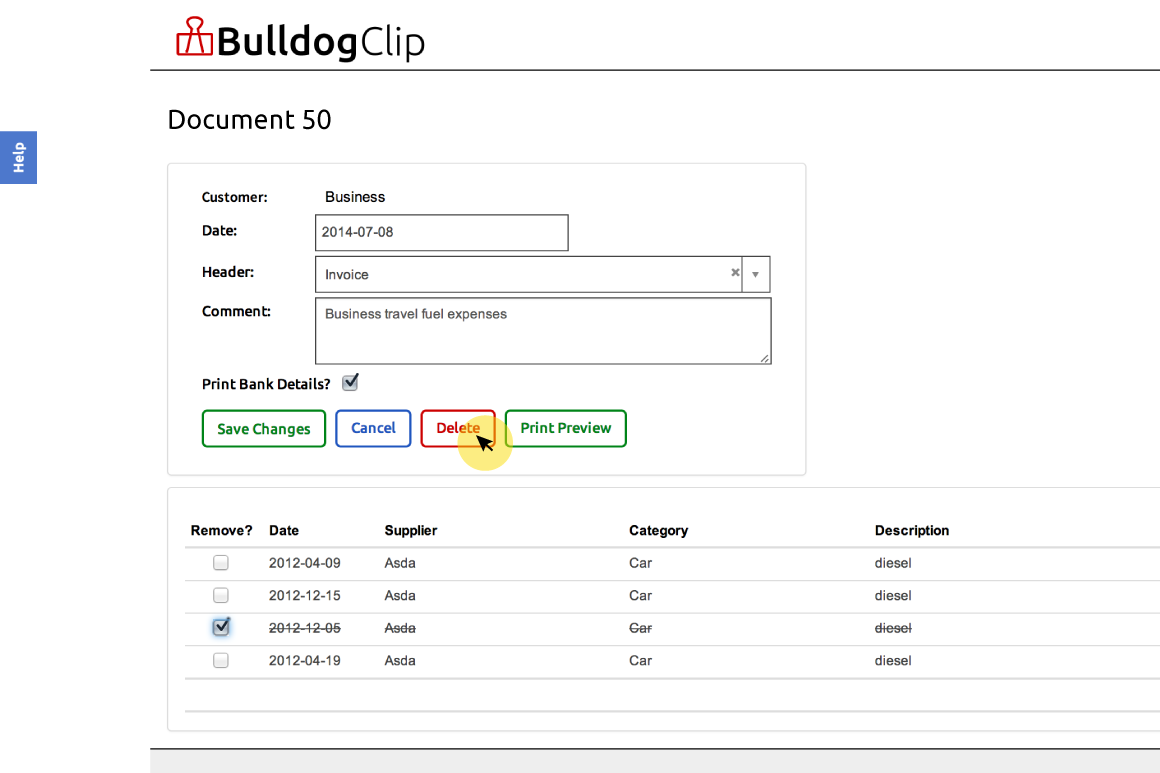
To permanantly delete the document select the 'Delete' button.
You will be asked to confirm that you want to go ahead with the delete. If you want to go ahead with the delete select 'OK', otherwise select 'Cancel'.
Your document will be permanently deleted and removed from your documents list. The bills associated with the document will be returned to the Bills list.
Download a PDF of a document for print or email
Select 'Documents' from the main menu.
This will bring you to a list of all your existing documents.
Find the document in the list that you want to print and select the row by clicking or tapping. You may want to use the Filter feature if you have a lot of documents (see Find An Existing Document).
This will open up the document so you can see its contents.
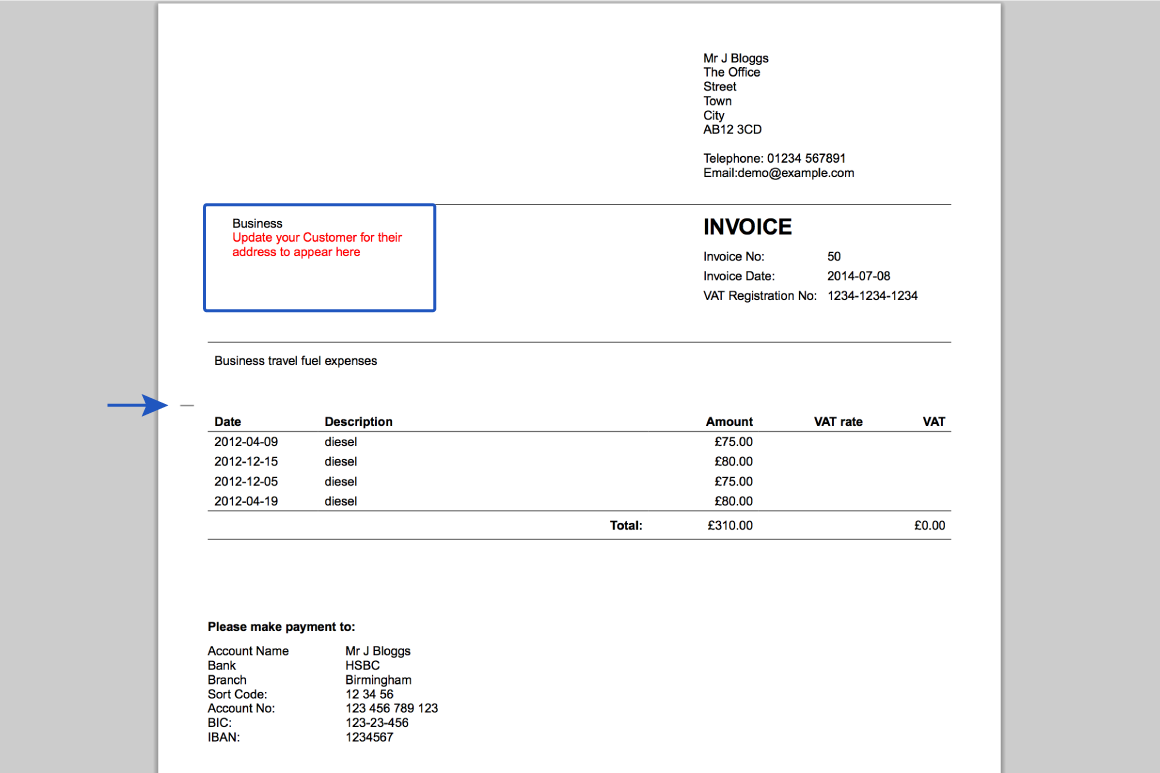
To create a fully formatted PDF of the document select the 'Print Preview' button.
A PDF of your document will open in a new tab on your browser window. You can save the document to your computer, print it or attach it to an email.
If you have not stored the customers or your own address details the print preview will show you a red message prompting you to do so.
A small line on the left hand side indicates where to fold the page for the customer address details to appear in the window of a window envelope.